Barbell Back Lunge: How to Do It, Muscles Worked & Form
The barbell back lunge loads a single leg at a time while a bar rides across your upper back, which makes it one of the most honest strength tests in the gym. There is no bracing a second leg to bail you out and no symmetrical stance to hide an imbalance behind. Every rep exposes exactly how strong, stable, and coordinated each side of your body actually is. That unilateral demand builds quad and glute strength that carries over directly to squats, deadlifts, and everyday movement like climbing stairs or cutting on a field, while asking comparatively little of your lower back.
Muscles Worked
- Quadriceps (primary): Rectus femoris, vastus lateralis, vastus medialis, and vastus intermedius drive the knee extension that pushes you back to standing. The long step length and deep knee bend load the quads through a large range of motion.
- Glutes (secondary): Gluteus maximus fires hard on the front leg as you extend the hip out of the bottom position, especially with a slightly forward torso lean.
- Hamstrings (stabilizing): Biceps femoris, semitendinosus, and semimembranosus assist at the hip and help decelerate the descent, though their contribution is smaller than the quads and glutes.
- Core and hip stabilizers (supporting): Because you are balanced on a narrow, staggered base, your obliques, deep core, and hip abductors work continuously to keep you from tipping sideways or rotating.
How to Do the Barbell Back Lunge
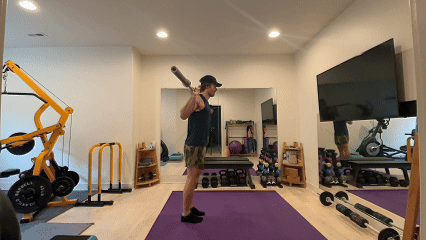
- Position a barbell securely across your upper traps, gripping it slightly wider than shoulder-width. Stand upright with your feet hip-width apart, and brace your core. Keep your chest up, shoulders pulled back, and gaze forward.
- Focus on engaging your quadriceps, hamstrings, and glutes. Tighten your core to stabilize your spine and maintain balance throughout the movement. Keep your weight evenly distributed across your front foot and avoid leaning forward.
- Step forward with one leg, landing on your heel, and lower your body until your back knee nearly touches the floor. Keep your front knee directly above your ankle without letting it travel past your toes. Push through the heel of your front foot to engage the glutes and quads.
- Press firmly through your front foot to step back to the starting position, keeping the movement controlled. Alternate legs for the next repetition, maintaining proper posture and core engagement throughout.
Coaching Cues
- Tall spine, not a forward collapse. Keep your ribcage stacked over your pelvis. A small forward lean is fine and even helps the glutes, but a rounded back means the load is too heavy or your core is not braced.
- Front knee tracks the toes. Point your front knee in the same direction as your front foot throughout the descent. Letting it cave inward puts unwanted stress on the knee joint.
- Drive through the front heel. The rear leg is there for balance, not propulsion. Push through the front heel and midfoot to stand back up, and you will feel the glute and quad working, not the calf.
- Control the descent. Lower for a full two seconds rather than dropping into the bottom position. The eccentric portion is where most of the muscle-building stimulus and stability training happens.
- Brace before you step. Take your breath and set your core tension before your foot leaves the floor, not after. A late brace is a common reason lifters feel unstable at the bottom.
Common Mistakes
- Stepping too short: A short stance forces the front knee far past the toes and turns the movement into a knee-dominant, quad-only exercise with almost no glute involvement. Take a long enough step that your front shin stays close to vertical at the bottom.
- Losing balance sideways: Placing the feet on a single line, as if walking a tightrope, makes the lunge unnecessarily unstable. Keep a few inches of width between your feet, similar to your normal squat stance.
- Bouncing off the back knee: Letting the back knee slam into the floor and bounce back up removes tension from the working muscles and risks a knee injury. Lower under control and stop just short of contact.
- Rounding forward under load: A rounded upper back shifts stress toward the spine instead of the hips and legs. If you cannot keep your chest up with a given weight, drop the load until you can.
- Rushing the tempo: Because the lunge is unilateral, rushing reps sacrifices the balance and control that make the exercise valuable in the first place. Slow down, especially when learning the pattern.
Sets, Reps & Programming
The barbell back lunge works well as either a primary unilateral strength movement or a hypertrophy accessory. For strength, use 3 to 4 sets of 6 to 8 reps per leg with a moderate to heavy load, resting 2 to 3 minutes between sets since the balance demand adds fatigue beyond what the muscles alone experience. For hypertrophy, 3 sets of 10 to 12 reps per leg at a lighter load builds size while keeping technique clean across all reps. Many lifters place it after their main squat or deadlift movement as unilateral accessory work, since it exposes and corrects side-to-side strength imbalances that bilateral lifts can mask. Because balance and coordination are part of the skill, start with a light bar or even bodyweight to groove the pattern before adding significant load.
Safety
Balance is the primary safety concern with the barbell back lunge. Practice the movement without a bar, then with an empty bar, before progressing to working weight, and consider holding dumbbells at your sides instead of a barbell on your back if balance is still developing since dumbbells allow you to drop the weight instantly if you tip. Keep your front knee tracking over your toes to protect the knee joint, and avoid letting the back knee slam into the floor. If you have existing knee pain, reduce step length and range of motion before removing the exercise entirely, since a shorter range often resolves discomfort while still building strength.
Track It in LiftLogic
Unilateral lifts like the barbell back lunge are easy to undertrain quietly, since it is simple to favor your stronger leg without noticing over months of training. Logging each leg's working weight and reps separately makes an imbalance visible long before it becomes a nagging issue. LiftLogic records your sets, tracks your estimated one-rep max per leg, and surfaces personal records so you always know whether both sides of your lower body are actually progressing at the same rate. Download LiftLogic free on the App Store.