Standard Pull-Up: How to Do It, Muscles Worked & Form
The standard pull-up is the definitive test of upper-body pulling strength. Performed with an overhand grip and the full weight of your body, it builds exceptional lat width, bicep strength, and scapular stability in a way no cable or machine movement can fully replicate. Whether you are grinding toward your first clean rep or working through weighted sets, the mechanics you ingrain now carry over to every row, carry, and pressing variation in your program.
Muscles Worked
- Lats (latissimus dorsi) — the primary mover, responsible for adducting the arm at the shoulder and pulling your chest toward the bar. The lats carry roughly 30% of the workload and reach peak activation at the top of the movement.
- Biceps (long and short head) — powerful elbow flexors that contribute substantially through the mid-range of the pull. Both heads work at high activation in the standard overhand position.
- Infraspinatus (rotator cuff) — controls external rotation at the shoulder joint throughout the rep, protecting the glenohumeral joint under load.
- Lower traps — depress and stabilize the scapulae, creating the solid shoulder-girdle base that keeps each rep safe and mechanically efficient.
- Lower chest (pectoralis major, sternocostal head) — a minor contributor near peak contraction, assisting with shoulder adduction as the elbows come into the body.
How to Do the Standard Pull-Up
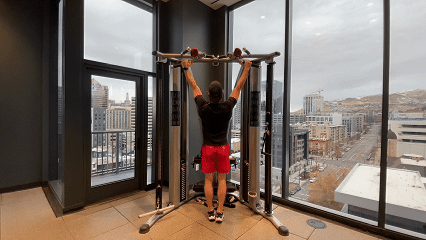
- Grip the pull-up bar with your palms facing away from you (overhand grip), hands placed slightly wider than shoulder-width apart. Hang with your arms fully extended, legs straight or slightly bent, and shoulders actively pulled down and back rather than shrugging toward your ears.
- Before bending your elbows, initiate the movement with your shoulder blades: pull them down and together to engage the lats. This scapular depression sets the lats as the prime mover and takes unnecessary stress off the shoulder joint.
- Drive your elbows toward your back pockets while pulling your chest up toward the bar. Keep your chin slightly tucked and your torso vertical. Avoid swinging, kipping, or leaning back excessively.
- Continue pulling until your chin clears the bar. At the top, your lats should feel fully contracted and your shoulder blades tightly retracted. Pause briefly if you can hold the position cleanly.
- Lower yourself in a slow, controlled descent back to a full dead hang with arms completely straight. Do not drop quickly or stop short at the bottom. Reset your brace and repeat.
Coaching Cues
- "Elbows to your back pockets" — visualizing driving your elbows down and back toward your hips activates the lats far more effectively than thinking about pulling your chin up.
- "Chest to the bar" — targeting the upper chest rather than just clearing your chin shifts more demand onto the back muscles and less onto the arms alone.
- "Hollow body" — a slight forward pelvic tilt, braced abs, and squeezed glutes stop the lower body from swinging and direct tension into the lats where it belongs.
- "Dead hang every rep" — returning to a full arm extension ensures a complete range of motion and prevents the shortened partial reps that stall progress for beginners.
- "Scaps first" — depressing and retracting the scapulae before the elbows flex is the single cue that separates a healthy, high-rep pull-up from a shoulder-grinding one over a long training career.
Common Mistakes
- Half reps — stopping short at the bottom without returning to a full dead hang reduces the range of motion, cuts lat engagement, and limits long-term development. Lock out your elbows on every rep.
- Shrugging the shoulders — allowing the traps to elevate at the start places excessive load on the neck and upper traps rather than the lats. Pull shoulders down before you pull the body up.
- Kipping or swinging — using momentum shortens time under tension and shifts load away from the target muscles. It also increases shoulder impingement risk significantly. Build strict reps first.
- Looking straight up — excessive neck hyperextension during the pull can compress the cervical spine. Keep your gaze forward and slightly upward with your chin gently tucked.
- Grip too wide — a grip substantially wider than shoulder-width reduces the pulling arc and shifts stress toward the shoulder joint rather than the lats. Keep hands just outside shoulder width.
Sets, Reps & Programming
The pull-up carries a Hard strength rating and a Medium skill rating, placing it in intermediate-to-advanced territory as a bodyweight compound. For strength and hypertrophy, perform 3 to 5 sets of 5 to 10 reps with 2 to 3 minutes of rest between sets. Beginners who cannot yet complete a full unassisted rep should use a resistance band looped over the bar, or swap to the machine-assisted pull-up, to build the motor pattern before going unassisted. For muscular endurance, 3 to 4 sets of 10 to 15 reps with 90 seconds of rest develops lasting pulling capacity and is excellent for general fitness and calisthenics progressions. Advanced lifters targeting maximum strength can add load via a dipping belt and work in the 3 to 5 rep range per set. The pull-up slots naturally at the start of a back session when the lats are fresh, or pairs well as a superset with horizontal pushing movements such as the bench press to balance pressing and pulling volume through the training week.
Safety
The pull-up is a closed-chain movement: the hands remain fixed and the body moves through space, which generally places lower compressive stress on the shoulder joint than equivalent open-chain cable or machine pulling. Even so, shoulder health deserves attention. Always start from a proper active dead hang rather than a passive, loose hang that dumps load into the passive shoulder structures. Depress the scapulae before pulling. Avoid high-rep pull-ups during active shoulder impingement flare-ups and scale back to assisted variations until the joint is symptom-free. Grip strength often becomes a limiting factor early in training: straps are acceptable for weighted or high-rep sets, but should not replace building raw grip endurance over time. If you feel a sharp pinch or clicking at the top of the movement, reduce your range of motion and consult a sports medicine professional before continuing to load the pattern.
Track It in LiftLogic
Log your pull-up sets, reps, and added weight in LiftLogic to track your progression over time, spot stagnation before it costs you months, and keep every workout in one place alongside the rest of your program. Download LiftLogic free on the App Store.